Overview
| module url | N/A | ||||||||||||||||||||
| git repository | https://bitbucket.org/arrizza-public/3d-print-servo-hs-311 | ||||||||||||||||||||
| git command | git clone git@bitbucket.org:arrizza-public/3d-print-servo-hs-311.git | ||||||||||||||||||||
| verification report | https://arrizza.com/web-ver/3d-print-servo-hs-311-report.html | ||||||||||||||||||||
| version info |
|
- repo status: Repo Information
- installation: Common Setup
Summary
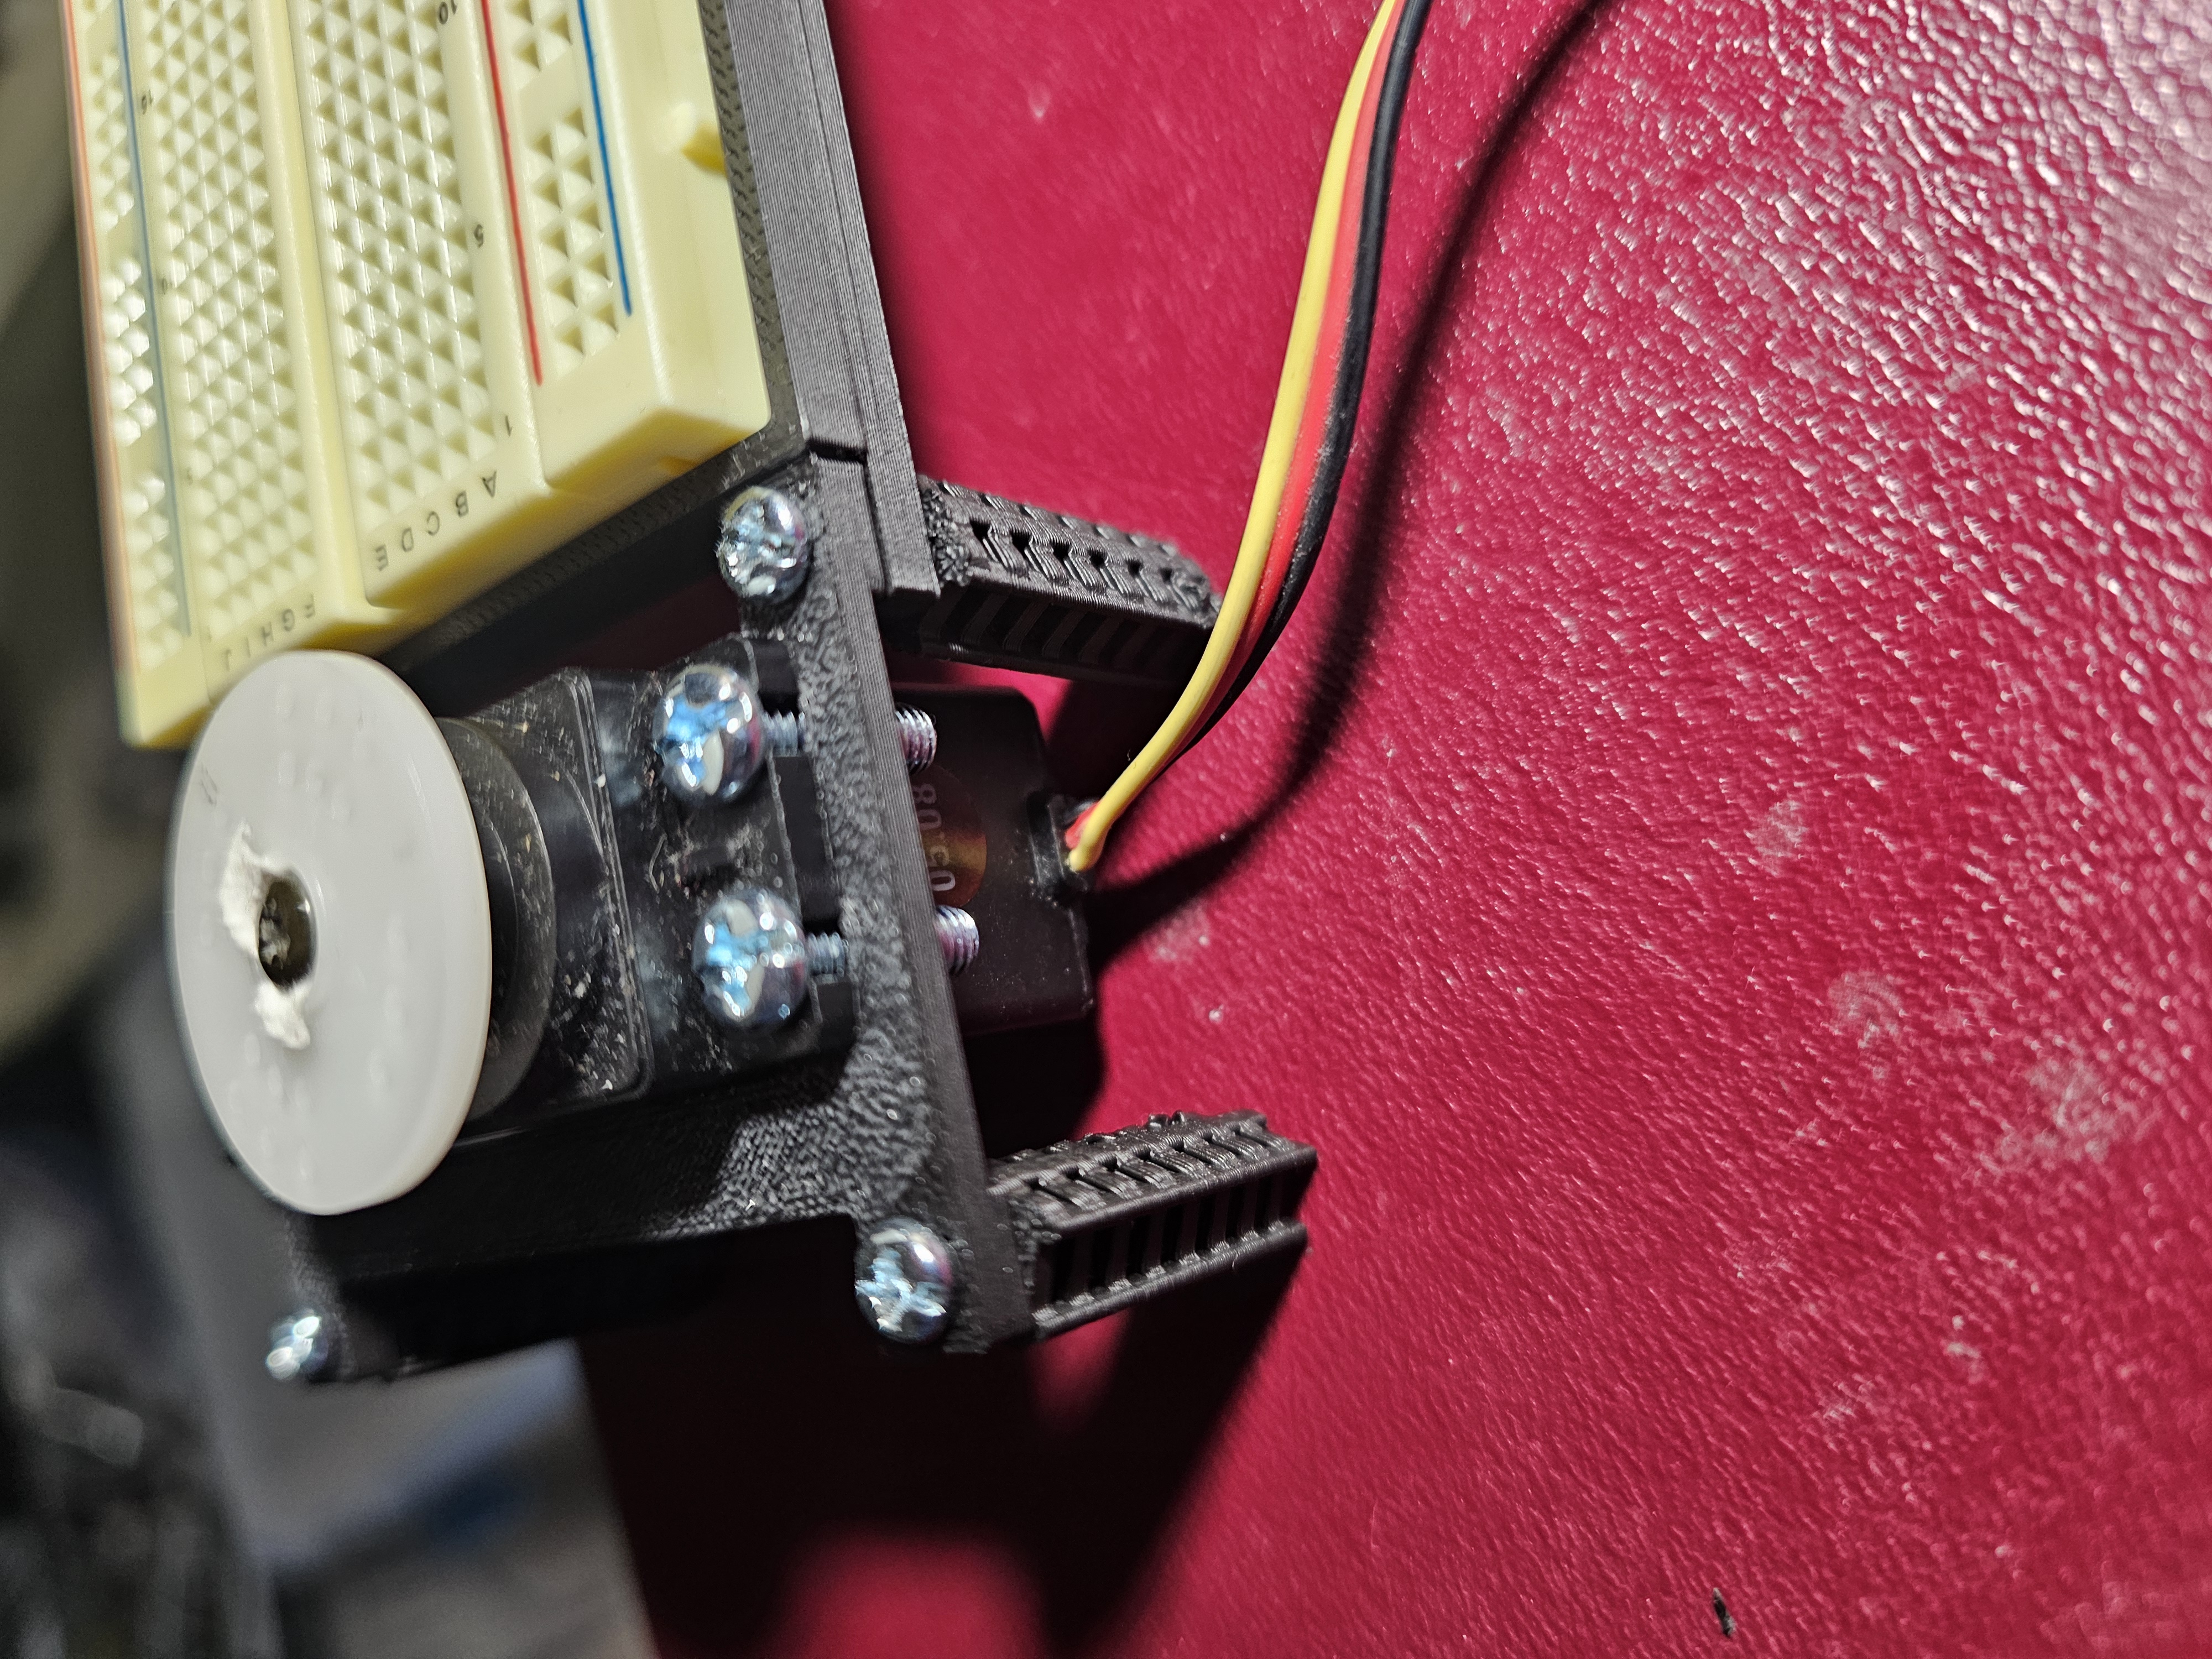
This creates a holder for a serv0. The servo is at the same height as the Breadboard (half length)
The idea is that the two holders can be attached together using Bracket Legs and so become a single unit. This is for convenience but also prevents wires to/from the servo from disconnecting.
This holder is specific to the Hitec HS-311 servo.
See doc/HS-311-Servo-Specs__19339.jpg for dimensions
Hitec HS-311 servo
To use the holder
Print the holder. See doc/how-to-print.md for a full set of instructions.
Place the servo in the holder and attach it with 4 bolts (I used M4s).
check it out
Confirm that the servo fits snugly in the space in the holder.
add the legs
The breadboard holder and the servo holder should be at the same height. This turned out to be 4 legs in the leg-stack. Which is a total of around 1" in height.
The two inner ones need to be a bit shorter since the servo plate takes up some additional height. I was able to scrape off the tiny "feet" of the two inner legs which is pretty close the needed height.
This photo shows servo next to the breadboard.
How to 3D print
Note: this assumes you are using a BambuLab 3d printer. I have a BambuLab A1 Mini.
install openscad, etc
See doc/test_process.md to do the initial install:
# install openscad
# install Bambu Studio
./do_subm_update
./do_install full
run openscad
- run openscad
- load the .scad file
- click "File"
- click "Open File"
- navigate to the directory
- click Open
- render it by doing one of these (the image will go all yellow):
- click Design | Render
- press F6
- or, click icon with cube and corner arrows
- export it by doing one of these:
- click File | Export | Export as STL
- press F7
- or, click icon with page and "STL" on it
- navigate to this directory and save the .stl file into
./outdirectory
run Bambu Studio
In your 3d printer
- import the .stl file from
./out - slice it
- print it
- see README.md and check if it works as it is intended
If it works for you, and you're using a BambuLab A1 Mini, do these steps to create multiple copies of the model:
- open Bambu Studio
- import the stl file into your 3D printer
- ensure you are in the "Prepare" tab
- right-click on the model
- select "clone"
- click "+" as needed to get a total number of copies you need
- select them: press ctrl and then click on each of the copies
- right-click on the plate (not the model)
- select "arrange"; Bambu Studio will move and orient the copies for efficient printing
- click "Slice plate"
- click "Print plate"
- get a "Send print job" dlgbox
- click "Send"