Overview
| module url | N/A | ||||||||||||||||||||
| git repository | https://bitbucket.org/arrizza-public/3d-print-lin-5718l | ||||||||||||||||||||
| git command | git clone git@bitbucket.org:arrizza-public/3d-print-lin-5718l.git | ||||||||||||||||||||
| verification report | https://arrizza.com/web-ver/3d-print-lin-5718l-report.html | ||||||||||||||||||||
| version info |
|
- repo status: Repo Information
- installation: Common Setup
Summary
This creates a holder for the Lin 5718L-01P stepper motor (a NEMA 23).
It holds the motor still and provides a spot for an LED and detector to set/check a full rotation indicator.
To use the holder
Print the holder. See doc/how-to-print.md for a full set of instructions.
There are two options:
- short 8-32 bolts or
- long 6-32 or 8-32 bolts at least 3.5" long. I used 4".
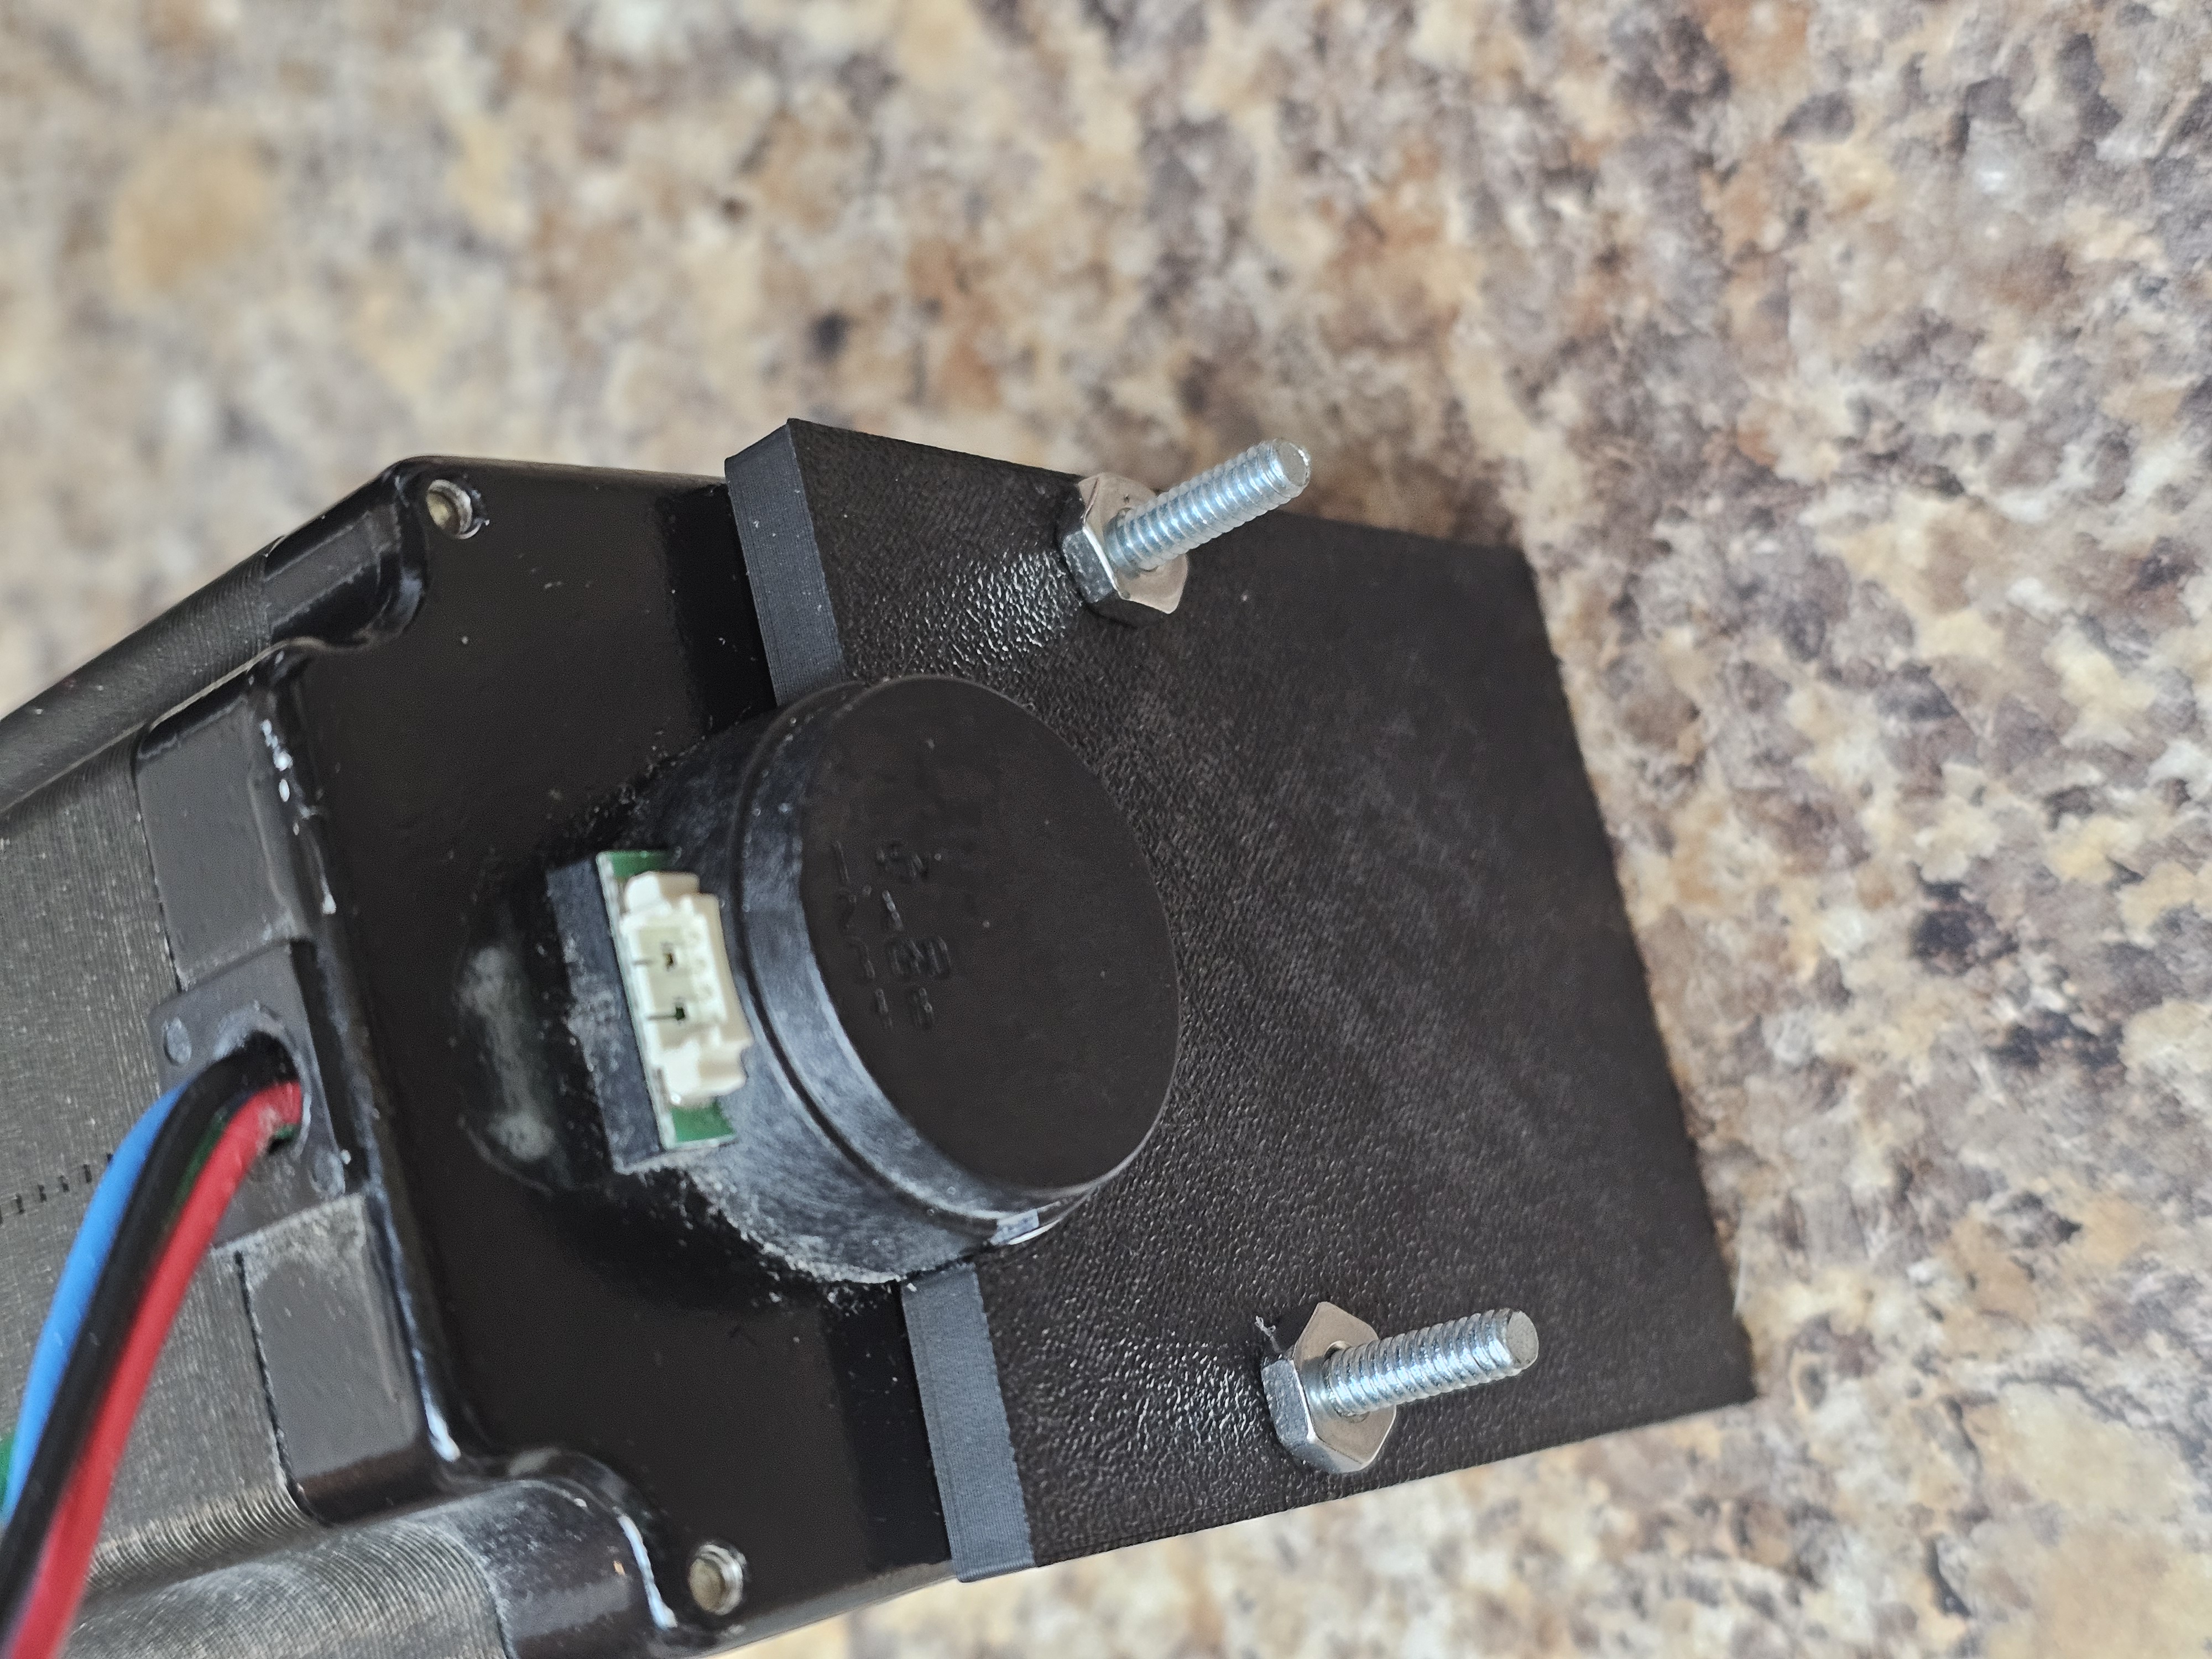
short bolts
- you'll need 2 x 8-32 bolts, 1/2 or 3/4" long
- bolt the front plate to the NEMA 23 with the two bolts
- adjust the rear plate on it, use tape if necessary to hold it in place.
long bolts
- you'll need 2 x 8-32 bolts or much easier 2 x 6-32 bolts and nuts (or easier wing nuts)
- push the bolt through the front plate
- slide all the way to the rear plate.
- Tighten nuts (or wing nuts) to hold the two plates in place.
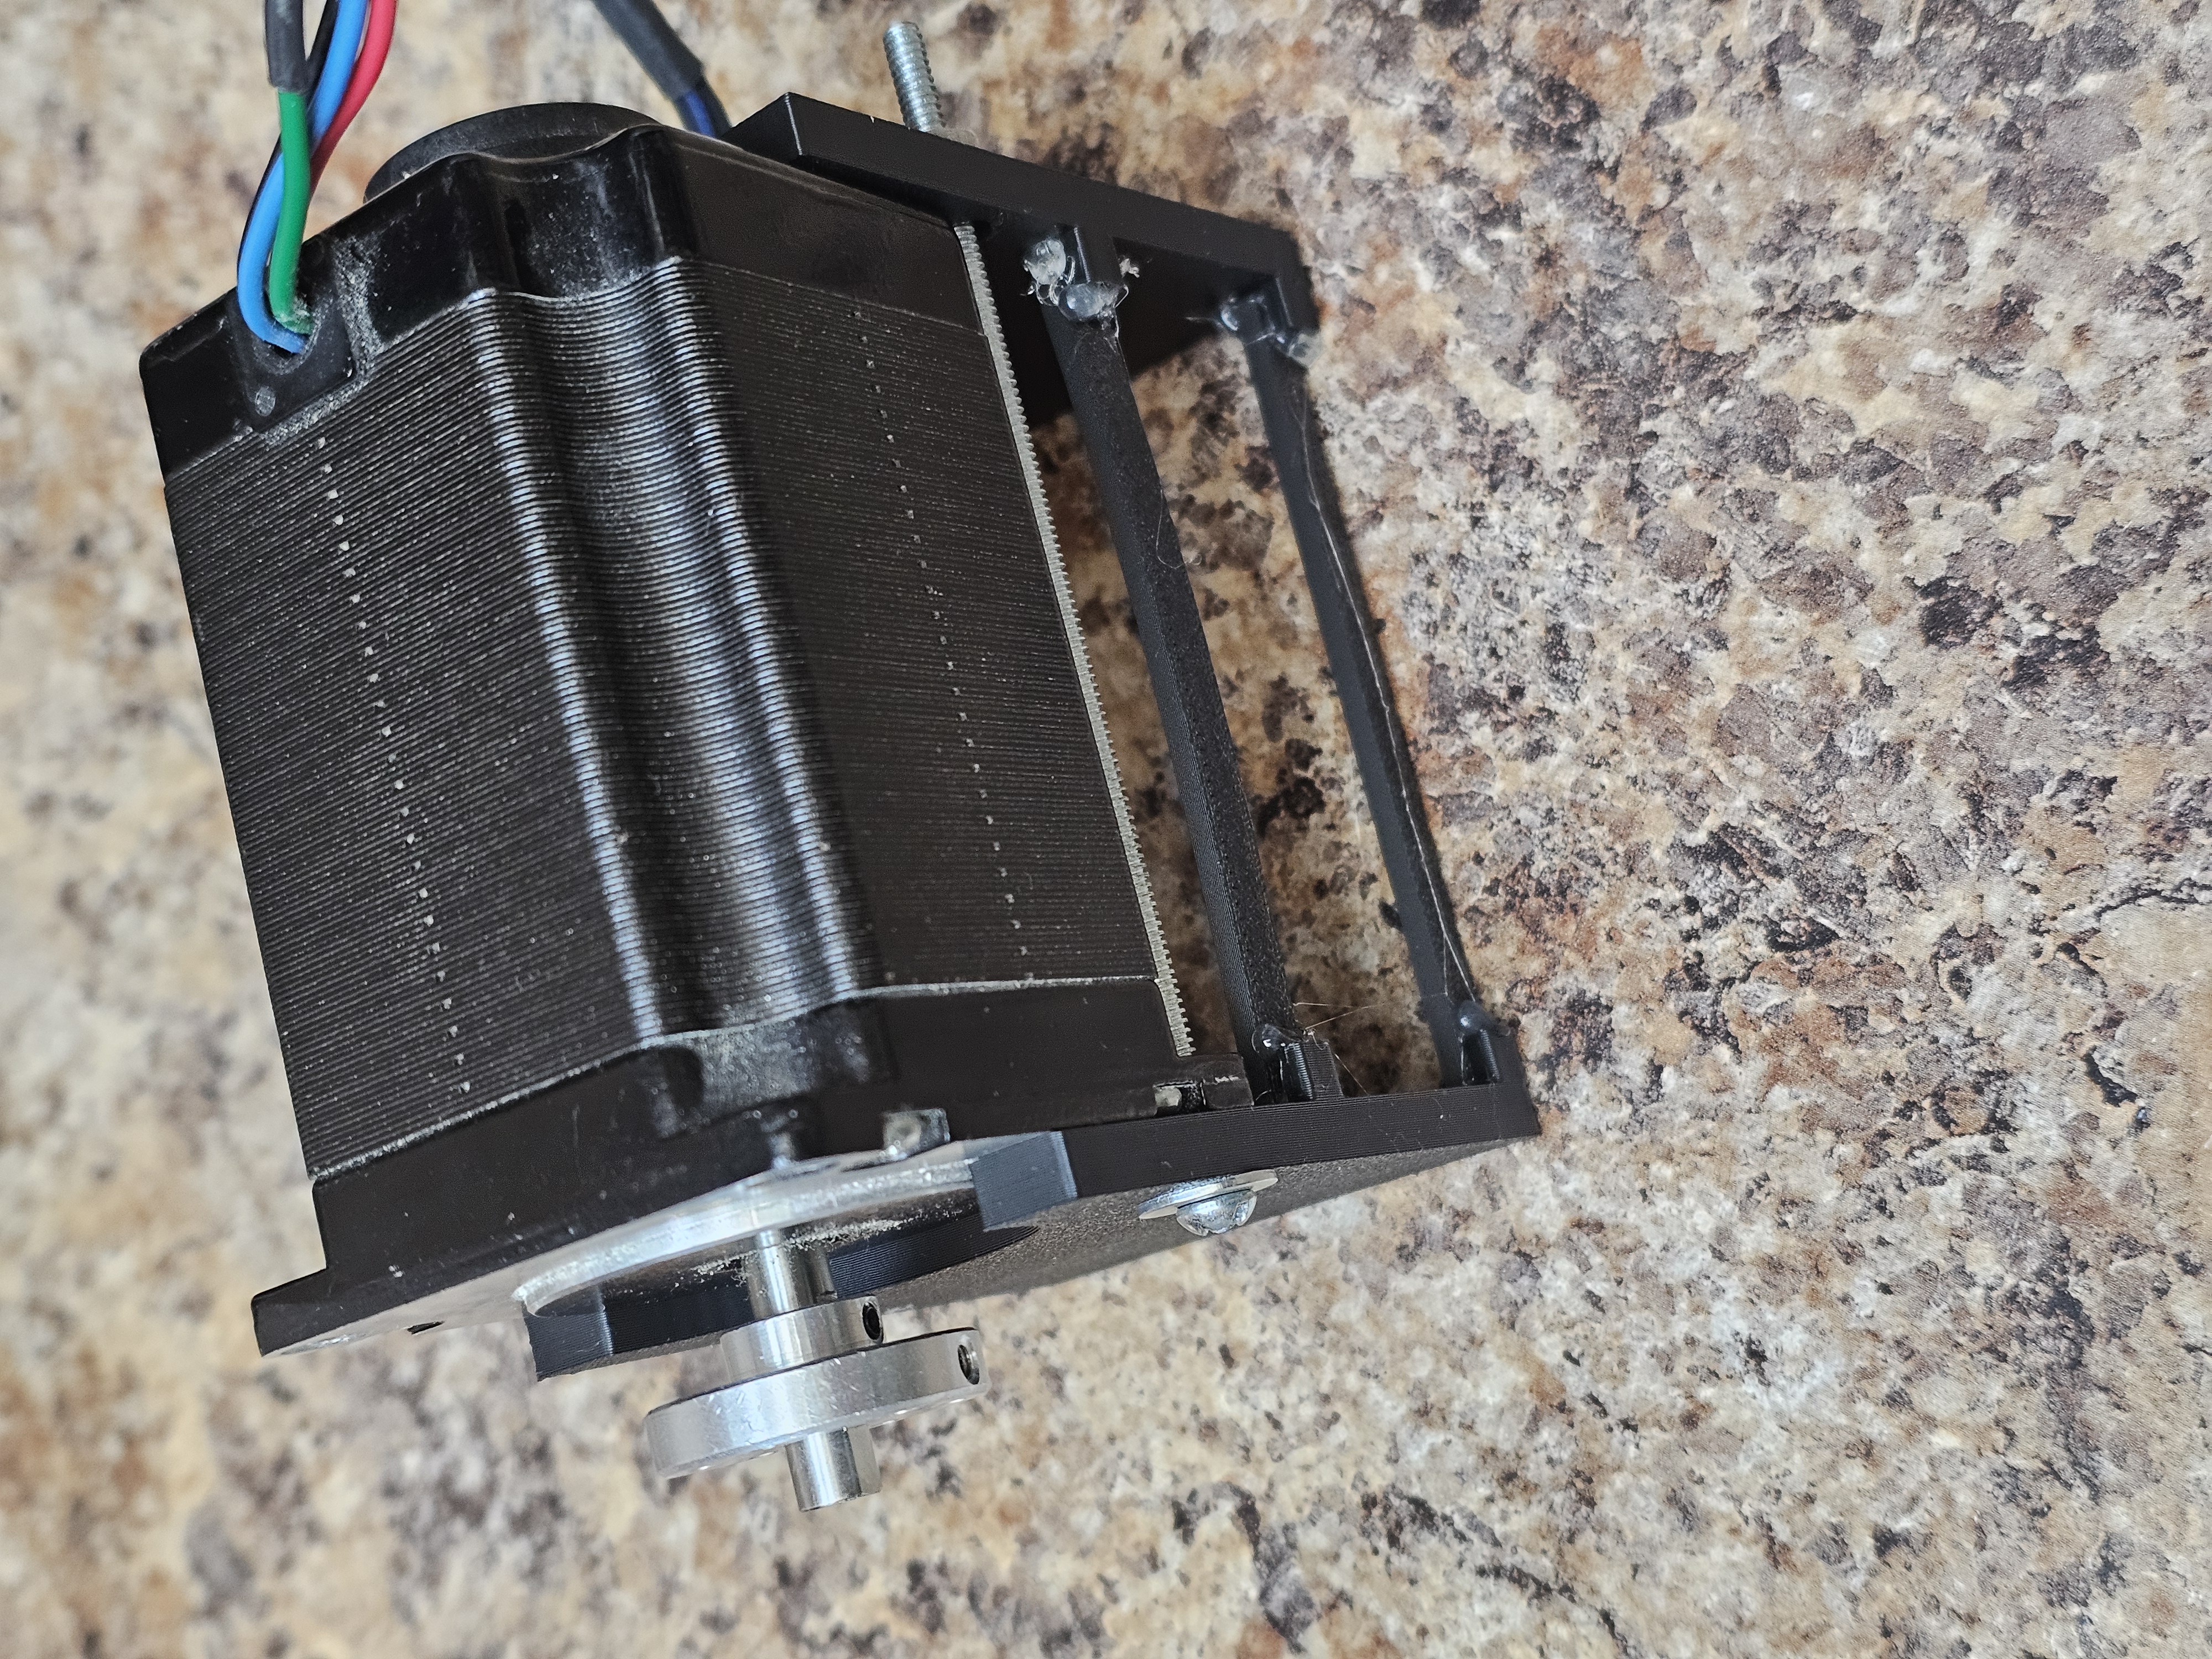
check it out
Confirm that the motor is level! If not, you probably have the front and rear plates swapped.
The motor should be able to stand on the edges of the two plates. If not, your motor may be slightly different dimensions then mine. Adjust the scad as needed and re-print.
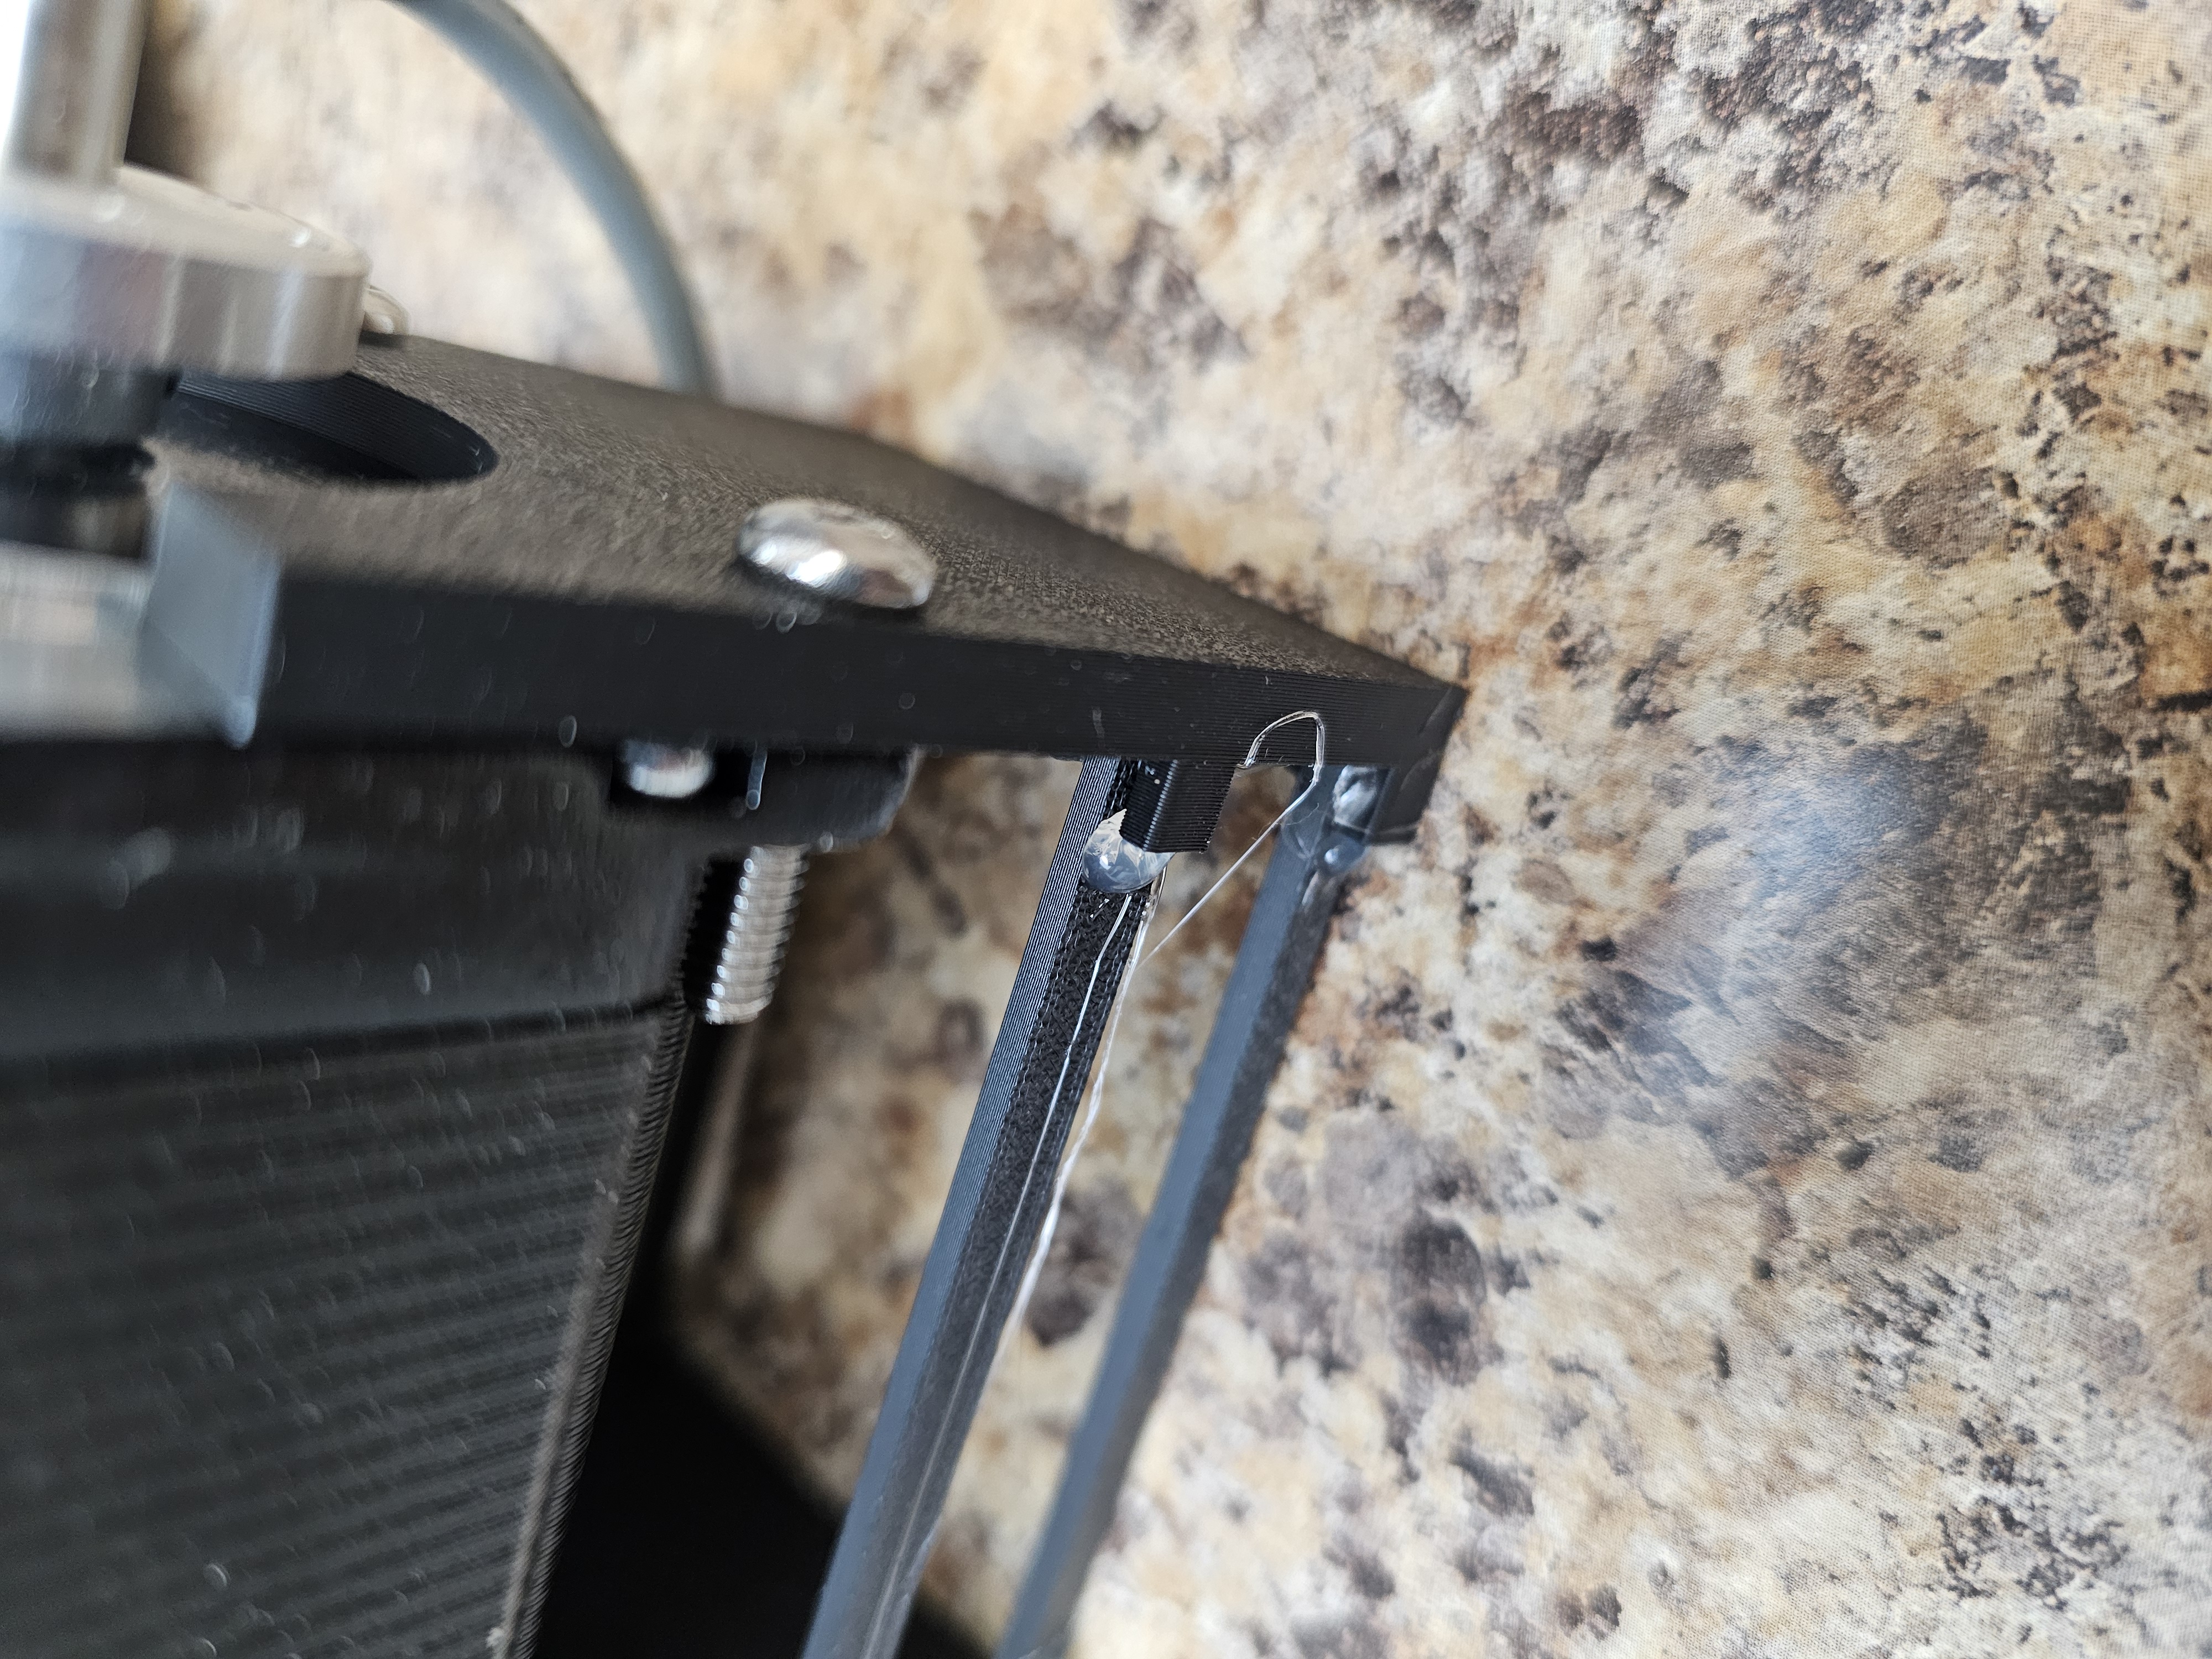
attach the braces
Use a hot glue gun to attach the braces
- do the top two first, then the bottom two
- put a drop of glue on one of the brace's ends
- attach the brace to the top tab on the front and rear plates
- use a pair of needle nose pliers are handy to squeeze the brace tight against the tab (wipe the pliers before the glue sets!)
- flip the motor and do the other brace on the top tab
- repeat for the bottom braces
- add a drop of glue at the corners where each brace touches the tab
When the glue dries, the motor should be very stable and solid in the holder.
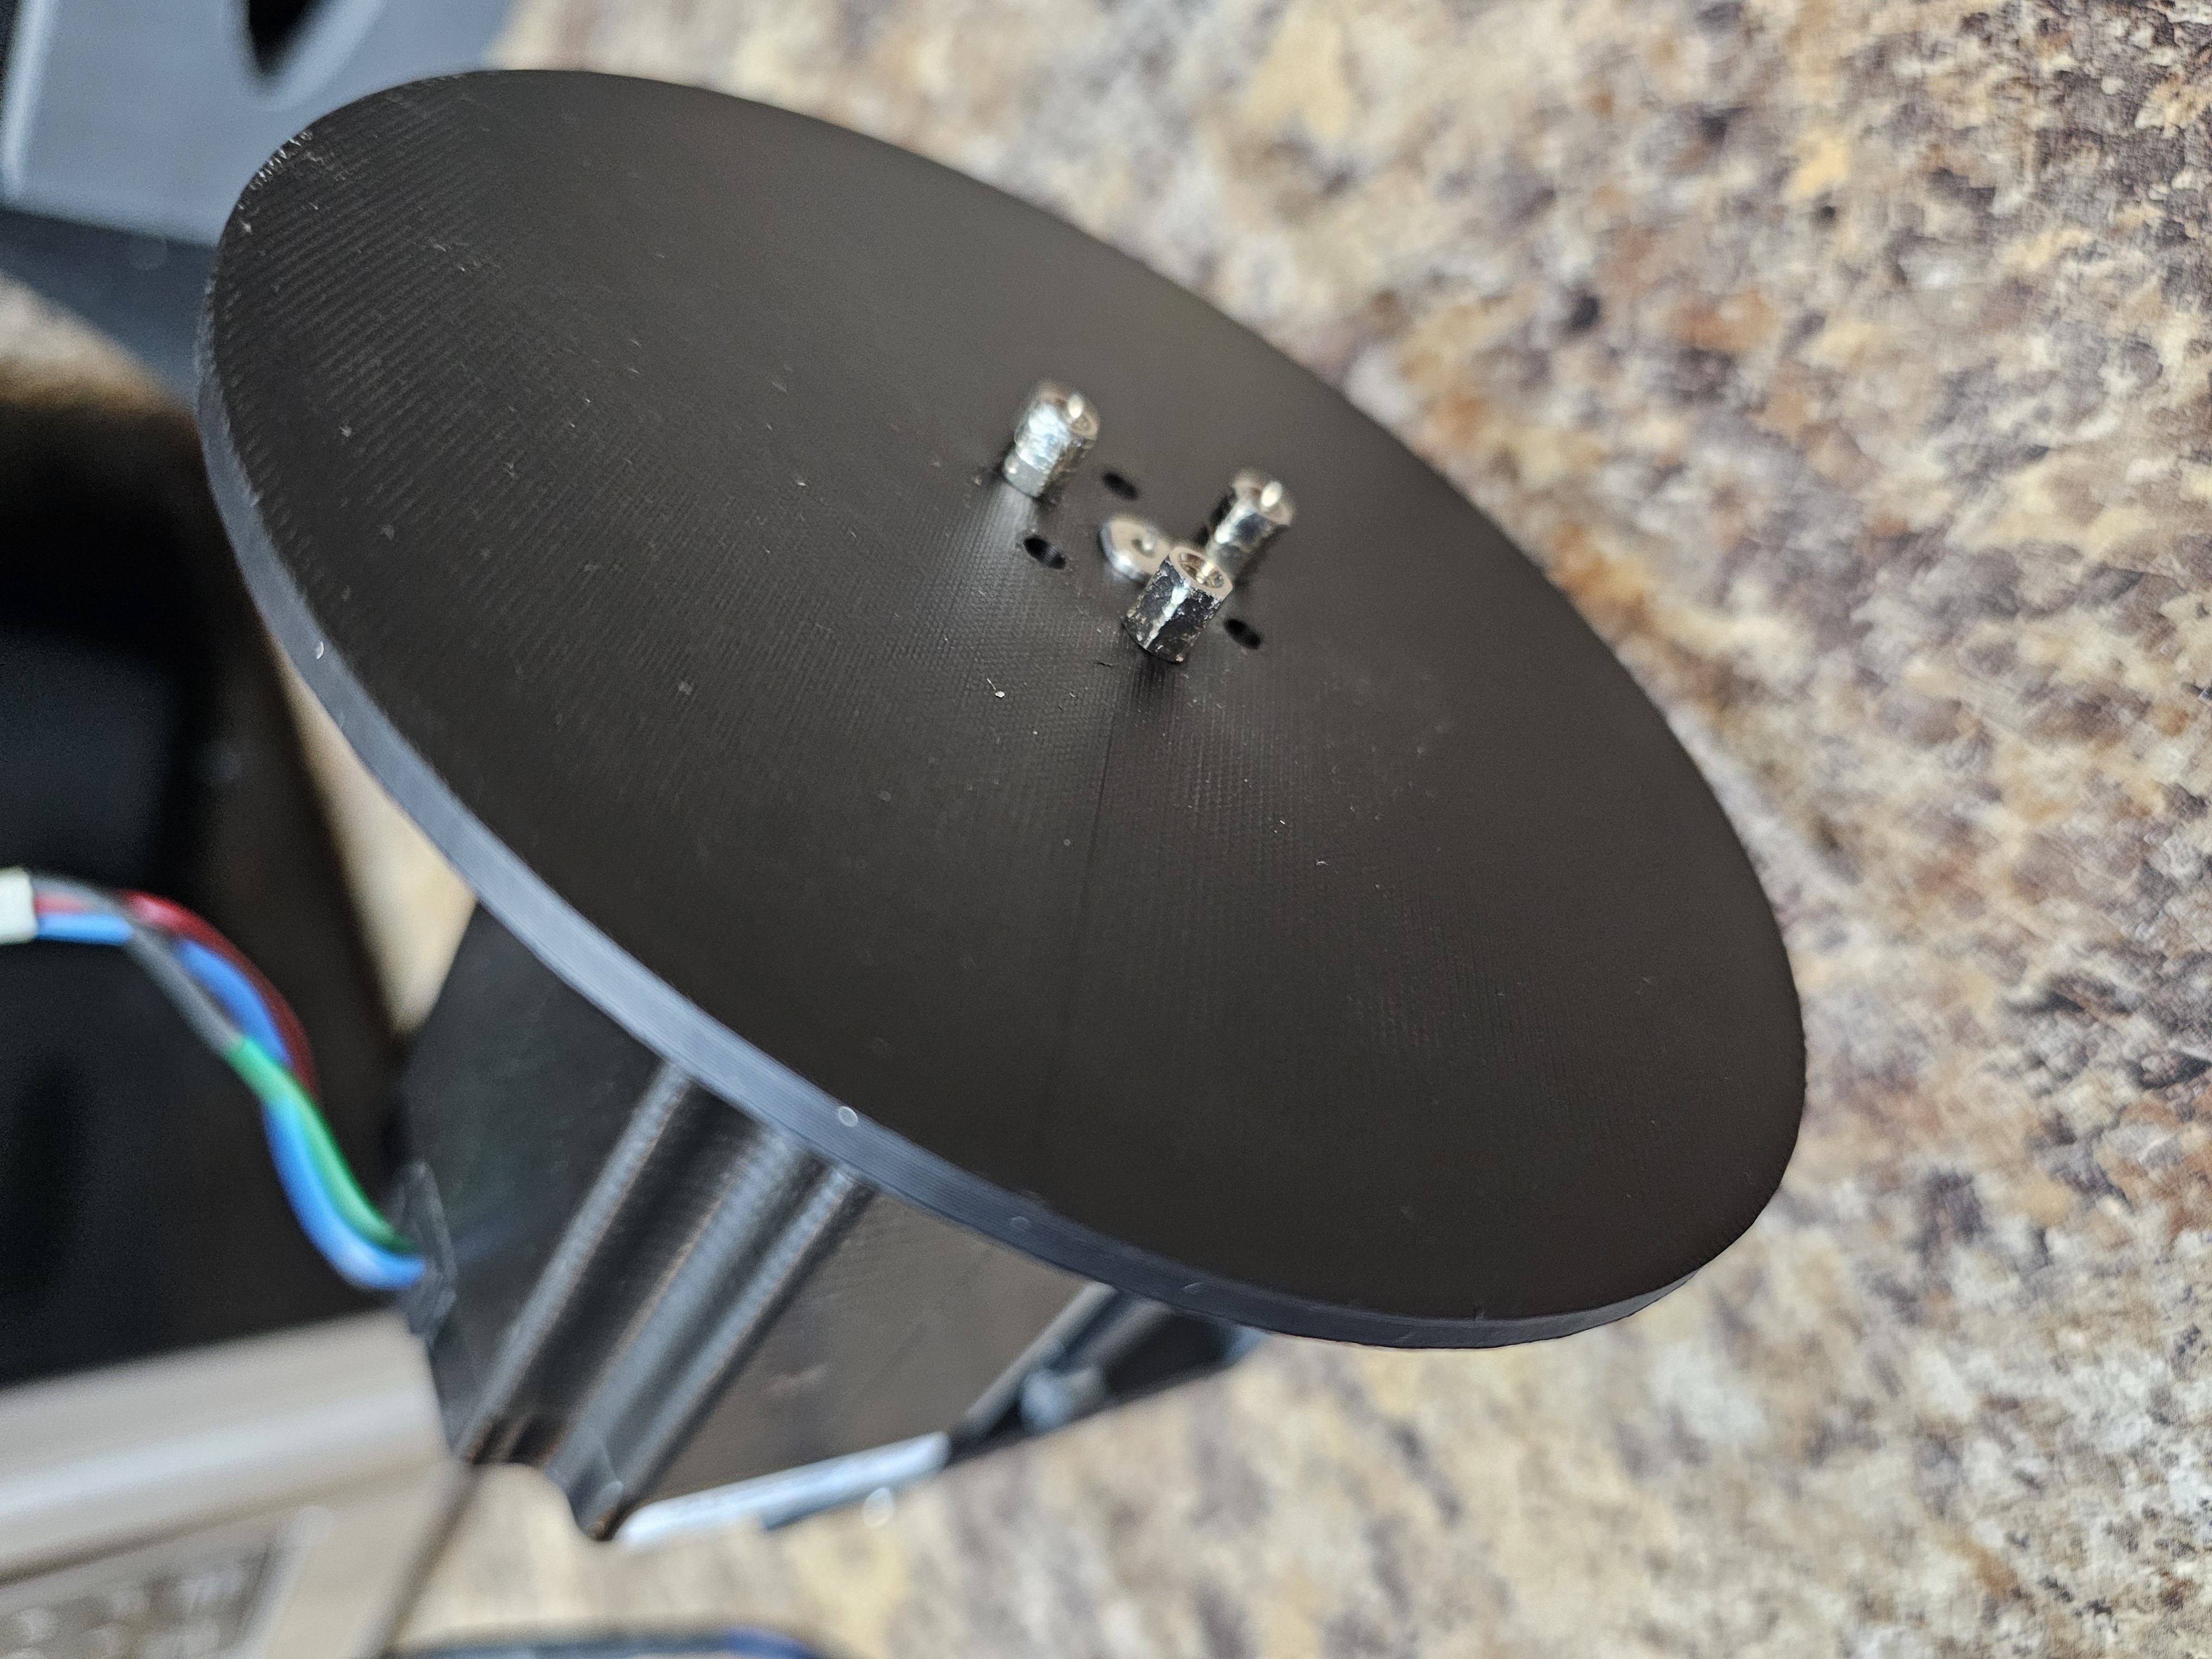
attach the disk
- print the "lin-5718L-disk-v3.scad" using the same process as for the holder
- check that the "top-dead-center" hole is clear. It is very small and it can be clogged with PLA during the printed process.
- attach the clamp to the disk
- I used Pololu Universal Aluminum Mounting These fit the 1/4" shaft on the NEMA23 stepper.
- The clamps take 4-40 bolts.
- attach the clamp & disk to the stepper
How to 3D print
Note: this assumes you are using a BambuLab 3d printer. I have a BambuLab A1 Mini.
install openscad, etc
See doc/test_process.md to do the initial install:
# install openscad
# install Bambu Studio
./do_subm_update
./do_install full
run openscad
- run openscad
- load the .scad file
- click "File"
- click "Open File"
- navigate to the directory
- click Open
- render it by doing one of these (the image will go all yellow):
- click Design | Render
- press F6
- or, click icon with cube and corner arrows
- export it by doing one of these:
- click File | Export | Export as STL
- press F7
- or, click icon with page and "STL" on it
- navigate to this directory and save the .stl file into
./outdirectory
run Bambu Studio
In your 3d printer
- import the .stl file from
./out - slice it
- print it
- see README.md and check if it works as it is intended
If it works for you, and you're using a BambuLab A1 Mini, do these steps to create multiple copies of the model:
- open Bambu Studio
- import the stl file into your 3D printer
- ensure you are in the "Prepare" tab
- right-click on the model
- select "clone"
- click "+" as needed to get a total number of copies you need
- select them: press ctrl and then click on each of the copies
- right-click on the plate (not the model)
- select "arrange"; Bambu Studio will move and orient the copies for efficient printing
- click "Slice plate"
- click "Print plate"
- get a "Send print job" dlgbox
- click "Send"